Rufus stands as a powerful, user-friendly tool for creating bootable USB drives from ISO files, simplifying operating system installations. Whether setting up Windows, Linux, or specialized utilities, this free, open-source software streamlines the process for beginners and experts alike. Its lightweight design and compatibility with various systems make it a go-to choice for transforming USB drives into installation media with minimal effort.
Using Rufus with an ISO file involves selecting the correct image, configuring settings, and preparing a USB drive for booting. The software supports a wide range of ISO files, including those for Windows 10, Windows 11, Ubuntu, and diagnostic tools. Its intuitive interface guides users through each step, ensuring compatibility with both UEFI and legacy BIOS systems, making it ideal for diverse hardware setups.
This guide explains how to use Rufus effectively with ISO files for installation purposes. From downloading the software to troubleshooting common issues, each section provides clear, actionable steps. Whether installing a new OS, recovering a system, or testing environments, Rufus delivers reliability and speed, empowering users to tackle installation tasks confidently on Windows and Linux platforms.
Getting Started with Rufus and ISO Files
Downloading and Installing Rufus
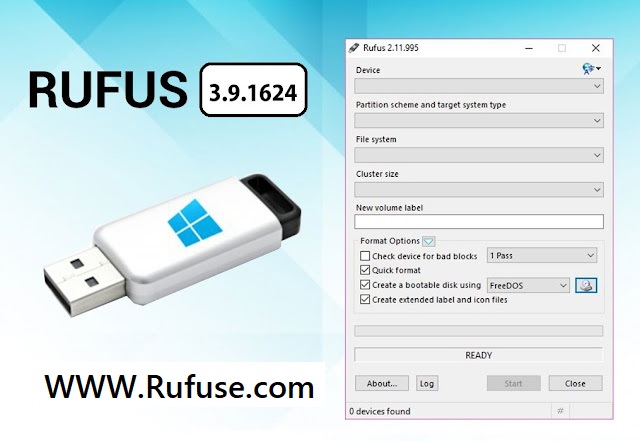
Rufus is available as a free download from its official website, ensuring users access the latest version. Compatible with Windows XP through 11, it requires no installation, running as a portable executable. Visit rufus.ie, select the appropriate version, and save the file to your computer. Launching Rufus is straightforward, requiring only a double-click to open the interface. Ensure administrative privileges for full functionality. The software’s small size ensures quick downloads, even on slower connections.
Selecting a Compatible ISO File
An ISO file, a disk image containing an operating system or utility, is essential for Rufus. Download ISOs from trusted sources, such as Microsoft for Windows or official Linux distribution websites for Ubuntu or Fedora. Verify the ISO’s integrity using checksums to avoid corrupted files. Rufus supports various ISOs, including Windows, Linux, and tools like MemTest86. Ensure the ISO matches your target system’s requirements for a successful installation.
Choosing the Right USB Drive
Select a USB drive with sufficient storage for the ISO file, typically 8GB or larger for modern operating systems. Rufus will erase all data on the drive, so back up important files beforehand. Use a reliable, high-speed USB 3.0 drive for faster performance, though USB 2.0 works for older systems. Check the drive’s health to avoid errors during the bootable media creation process. Rufus detects inserted USBs automatically for easy selection.
Configuring Rufus for Bootable USB Creation
Selecting the ISO File in Rufus
After launching Rufus, insert the USB drive and select it from the “Device” dropdown. Click the “Select” button next to “Boot selection” to browse and choose your ISO file. Rufus verifies the ISO’s compatibility, displaying its details, such as the operating system name. Ensure the correct ISO is selected to avoid errors. Key configuration options include:
- Automatic detection of ISO type
- Support for Windows and Linux ISOs
- Option to use disk or ISO image
- Validation of ISO integrity
- Quick selection for recent files This step ensures Rufus prepares the USB correctly.
Setting Partition Schemes and File Systems
Rufus offers options to configure partition schemes (MBR or GPT) and file systems (FAT32, NTFS, or exFAT). Choose MBR for legacy BIOS systems or GPT for UEFI-based hardware. Select NTFS for Windows installations or FAT32 for broader compatibility, especially with Linux. Adjust cluster size for optimal performance if needed. Rufus automatically suggests settings based on the ISO and system, simplifying the process for most users.
Customizing Boot Options
Rufus allows customization of boot options, such as enabling persistent storage for Linux distros or adjusting bootloaders. For Windows, ensure “Standard Windows installation” is selected unless creating a “Windows To Go” drive. Advanced users can tweak bootloader settings for specific needs, like network booting. Verify UEFI or BIOS compatibility to match your target system. These settings ensure the USB boots correctly on the intended hardware.
Creating the Bootable USB with Rufus
Starting the Creation Process
Once the ISO and settings are configured, click “Start” in Rufus to begin creating the bootable USB. Rufus prompts to confirm data erasure on the USB drive, as the process is destructive. The software formats the drive, copies the ISO contents, and configures the bootloader. A progress bar displays the status, typically completing in 5-15 minutes depending on the USB speed and ISO size. Avoid removing the USB during this process.
Handling Format and Copy Operations
Rufus formats the USB drive using the selected file system and partition scheme, ensuring compatibility with the target system. It then extracts and copies the ISO files to the drive, creating a bootable structure. The software optimizes the process for speed, leveraging USB 3.0 for faster transfers when available. If errors occur, Rufus displays alerts, such as corrupted ISOs or faulty drives, allowing users to address issues promptly.
Verifying the Bootable USB
After completion, Rufus offers an option to check the USB for bad blocks, ensuring reliability. This step scans the drive for defective sectors, which could cause installation failures. Users can save a log file for troubleshooting if issues arise. Test the USB by booting a system to confirm it loads the OS installer correctly. This verification step ensures the drive is ready for installation or recovery tasks.
Booting and Installing from the USB Drive
Configuring System BIOS/UEFI Settings
To boot from the USB, enter your system’s BIOS or UEFI setup, typically by pressing keys like F2, F12, or Del during startup. Set the USB drive as the primary boot device in the boot order menu. Enable UEFI or legacy boot modes as required by your ISO and Rufus settings. Save changes and restart to boot from the USB. Key steps include:
- Accessing BIOS/UEFI via boot key
- Prioritizing USB in boot order
- Enabling secure boot for modern systems
- Selecting UEFI or legacy mode
- Saving and exiting BIOS settings This ensures the system recognizes the bootable USB.
Running the OS Installation
Once booted, the USB loads the OS installer, such as Windows setup or a Linux distro’s live environment. Follow the on-screen prompts to install the operating system, selecting the target drive and configuring settings like language or partitioning. For Windows, enter a product key if required; for Linux, choose between live mode or direct installation. The process varies by OS but leverages the USB’s bootable structure created by Rufus.
Troubleshooting Boot Issues
If the USB fails to boot, verify BIOS/UEFI settings match Rufus’s configuration (e.g., MBR with legacy BIOS or GPT with UEFI). Check the ISO file’s integrity or recreate the USB with Rufus. Ensure secure boot is enabled or disabled as needed. Test the USB on another system to rule out hardware issues. Rufus’s log files can help diagnose errors, ensuring a smooth installation process.
Advanced Uses of Rufus with ISO Files
Creating Persistent Linux USBs
Rufus supports persistent storage for some Linux ISOs, allowing data and settings to be saved between sessions. Select the persistence option when configuring the ISO in Rufus, allocating space for storage. This feature is ideal for creating portable Linux environments for work or testing. Advanced options include:
- Adjustable persistent partition size
- Support for distros like Ubuntu
- Compatibility with live USB modes
- Data retention across reboots
- Easy reconfiguration for different ISOs This makes Rufus versatile for Linux enthusiasts.
Preparing Diagnostic and Recovery Tools
Rufus can create bootable USBs for diagnostic tools like MemTest86 or system recovery utilities. Select the appropriate ISO, configure minimal settings, and let Rufus prepare the drive. These USBs boot directly into diagnostic environments, perfect for troubleshooting hardware or recovering corrupted systems. This functionality is crucial for IT professionals performing maintenance tasks without relying on an installed OS.
Using Rufus for Firmware Updates
Rufus prepares USBs for firmware updates, such as BIOS or UEFI upgrades, using manufacturer-provided ISO files. Configure the USB with the correct file system (often FAT32) and copy the firmware files. Boot the system from the USB to apply updates, ensuring hardware compatibility. This advanced use case highlights Rufus’s flexibility for low-level system tasks beyond standard OS installations.
Tips and Best Practices for Rufus Users
Ensuring ISO File Integrity
Always verify ISO files using checksums (e.g., MD5 or SHA) provided by the source website to ensure they are not corrupted. Corrupted ISOs lead to failed installations or boot errors. Use tools like WinMD5 or built-in Linux commands to check integrity before using Rufus. Download ISOs from official sources to avoid malware. This step ensures reliable USB creation and successful installations.
Optimizing USB Drive Performance
Use high-speed USB 3.0 drives for faster ISO copying and booting, especially for large files like Windows 11 ISOs. Avoid using damaged or low-quality drives, as they may cause errors. Run Rufus’s bad block check to confirm drive health. Close unnecessary applications during the creation process to maximize system resources. These practices enhance efficiency and reduce the risk of failures during USB preparation.
Keeping Rufus Updated
Rufus receives regular updates to support new ISOs, hardware, and features. Check the official website or GitHub for the latest version before starting a project. Updates often include bug fixes and compatibility improvements, such as support for new Windows or Linux releases. Enable Rufus’s update check feature to stay informed. Keeping the software current ensures optimal performance and compatibility with modern systems.
Conclusion
Rufus simplifies using ISO files for OS installations, offering a fast, reliable way to create bootable USBs for Windows, Linux, and more. From configuring settings to troubleshooting boot issues, this guide covers every step. Its advanced features, like persistent storage and diagnostic tool support, cater to diverse needs. With regular updates and an intuitive interface, Rufus empowers users to handle installations confidently, making it an essential tool for tech enthusiasts.